Creating a theme:
Two items make a photo, the subject and backdrop, and I think that they are equally important. This is where your lens choice comes into play. A long lens allows you to send the back ground out of focus and narrow down the amount of background in the photo. A wide lens keeps the background in focus and allows it to be a key part of the image. Either way the background is playing a big factor by being a key element or by not distracting from the subject.
Settings—The Other Subject
The settings in which you make pictures of people are important because they add to the viewer's understanding of your subject. The room in which a person lives or works, their house, the city street they walk, the place in which they seek relaxation—whatever it is, the setting provides information about people and tells us something about their lives. Seek balance between subject and environment. Include enough of the setting to aid your image, but not so much that the subject is lost in it.
Tip #5: Capture You
My last tip is to use the images below only loosely as inspiration. A self-portrait should be a very personal expression, not simply a mirror of something you've seen elsewhere. Think about who you want to be and how you want to say that. Use props, scenery, pose and lighting conditions to convey your personality. And most of all, have fun!
Environmental Portrait

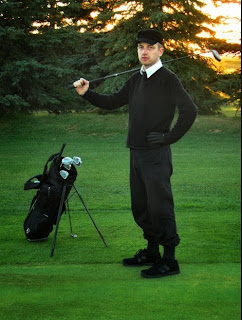
These two photos i really like for environmental portrait because it show these two people what they really are. Also that the background really suits the subject very well.
Casual Portrait


I like these photos because they are all happy and smiling. Also they show what they are in the inside.
Formal Portrait


I like these photos because they represent a good example of a Formal portrait.
Photography Self Portrait


I like these photos because they are being creative of how to shoot a picture of them selfs in many different ways.
My plan for the self portrait assignment is to take picture of friends, and family. I will shoot inside and outside to get different perspectives in the areas i take them in. I will use the rules of photography to help me out on taking photos, to make me successful. Also i will use some creative to miss around the rules of photography to make it more attractive to catch people's eyes.


